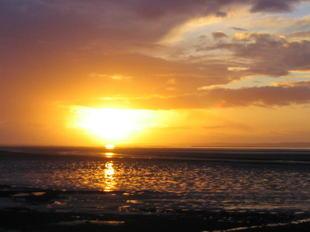
By learning new lighting techniques for taking pictures outside, you will be able to produce quality photos and avoid washed out or underexposed images.
Photography and Outdoor Lighting
Lighting is essential in the world of photography. The color, direction, quantity, and quality of the light you use determines how your subjects appear in photographs. While lighting is easily controlled indoors, a photographer is at its mercy when shooting outside. By knowing how to manipulate natural light sources in the great outdoors, you can better control the aforementioned effects and shoot better pictures.
Sun Factors
The sun is the single most important source of light when taking photos outdoors. Unfortunately, it is not a constant light source, since it changes hourly and is affected by factors, including:
- Time of day
- Weather
- Season
- Angles
- Latitude
As sunlight changes, it alters the shapes, colors, tones, and textures of a scene. This can be seen during a simple outdoor photo shoot on a sunny day. If you are taking pictures on a clear day at noon when the sun is directly overhead, you will be left with dark, well-defined shadows and brilliant highlights. Sunlight is harshest on clear summer days at noon. It makes strong colors more brilliant, and weak colors extremely pale.
Conversely, when clouds, mist or pollution in the air diffuses sunlight, it becomes softer and produces weak shadows and dull highlights. This results in photos that feature vibrant, well-saturated colors.
Lighting Techniques for Taking Pictures Outside

It's true that you cannot control the sun; however, you can apply certain lighting techniques when shooting outdoors to yield frame worthy shots. Here are a few of the most popular lighting techniques for taking pictures outside:
Backlighting
Backlighting is one the most effective lighting techniques used by photographers snapping shots outdoors. The concept is fairly simple and typically produces excellent results. The sun is in front of the photographer, aimed directly at the camera, and the subject is lit from the back. This type of lighting is especially effective when taking portraits of people outdoors in bright sunlight. If it is not employed, your subject is apt to squint his eyes or make an unpleasant facial gesture.
If you plan to use backlighting when taking shots outside, you may want to bring along a reflector or fill-in flash to brighten up the dark shadows and increase the detail of your subject. Avoid having the sun's rays fall directly on the lens of your camera by attaching a lens hood or some other object to help provide shade and prevent lens flare.
Frontlighting
The type of lighting created when the sun is at the photographer's back is called frontlighting. While this method is one that is most prevalently used by amateur photographers, it does not always yield the best results. Frontlighting often produces a flattened effect which robs your photos of depth and detail. To produce quality pictures with frontlighting, you need to get creative. To add depth and dimension to your subject, angle your body so that the sun is coming from over your shoulder or is hitting your subject diagonally.
Side Lighting
Once you master the ins and outs of front and backlighting, you may want to experiment with side lighting. For finely detailed pictures where texture is important, side lighting is ideal. This technique requires that you turn your subject, change the camera viewpoint, or wait for the sun to move, so that the light falls more to one side than the other. By lighting a subject from the side, you are able to capture an almost three-dimensional effect, as opposed to a flattened two-dimensional look that comes when the sun is shining directly on the surface of an object.Professional photographers often employ side lighting when shooting black-and-white images, which rely on gray tones, rather than color. The technique is especially effective because shadows caused by side lighting reveal details that can create striking pictures from ordinary objects that wouldn't really be worth shooting in black-and-white. For example, ripples of sand on a beach, raindrops in puddles and small waves can all gain impact when lit from the side. In addition, landscapes, buildings, and people, also photograph better when side lighted.
Just remember that when you are employing side lighting you may end up with harsh shadows. To lighten the shadows and reduce the contrast, consider using some type of reflector or fill-in flash.


